Build the InMoov Robot!
Build the InMoov Robot? If you have a 3D printer, YOU CAN!
Build the InMoov Robot? I am building the InMoov. I have printed all the parts for the hand or "Hand Robot" as it is called. I am planning on building the entire thing. In fact, that is exactly why I bought a 3D printer in the first place.
At this point in time no one, and I mean no one sells a complete life-size android (humanoid that is) robot. Unless you were to hire someone such as a special effects company to custom build you a functional animatronic robot at a cost of twenty to fifty thousand of dollars, you would not have one--until NOW!

Gael Langevin, a 41-year-old sculptor and model-maker from France has created the ultimate robot project--a LIFESIZE robot that ANYONE can print on a 3D printer and build the Inmoov robot in a few weeks.
> Click HERE to Read MORE about Gael <
The biggest time is spent not in building the beasty, but in PRINTING it.
Gael says, "It's about as difficult as assembling a cupboard from IKEA,"
So, if you too would like to print and build this robot, follow along with me and let's build one together. I will be updating this blog often: at least weekly and sometimes daily.
-- Thomas
Step 1: Build the Inmoov Robot: Print the "Hand Robot"

The InMoov "Hand Robot", that is the right robot hand and forearm is the first part that I will be building. Now please understand, Gael himself says that he updates parts quite often and what was there on Thingiverse.com today may be updated next week.
Step 1.1 Using a 3D plastic extrusion printer, print out all of the parts for the "handrobot". A lot of my friends are getting good results with the Airwolf 3d Printer. I have a Solidoodle and that has been problematic.
Step 1.2 Print the "simpleservobed" as well. This will be put into the forearm to hold the servomotors.

Printing so many parts can get one confused on what is printed, what part is what, and what goes with what. I have created a system that so far is working for me:
1. Label a large plastic zipper bag with the main part you are building. In my case I have one bag for each Thingiverse project page.
2. If a print job creates two or more parts, put those small parts into a small plastic zipper bag and putting that bag into a larger bag.
3. Label EVERY part with a permanent ink marker.
4. Label the bags, large and small, as well.
5. Create a check sheet with the part name, part picture and the file size.
6. Cross off each part or group of parts you print on your check sheet as you progress.
As you can see from the photo, I have completed printing the right hand (and forearm) and the right hand's simple servo bed which is mounted in the forearm.
Build the Inmoov Robot :
Trimming the Parts.
The InMoov robot parts are purposefully designed with extra support plastic that has to be trimmed away.
6/18/13 UPDATE
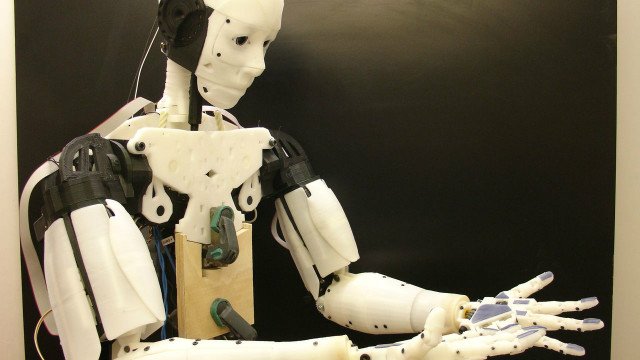
I've finished printing three hands, three wrists, three forearms, three sets of fingers, two biceps, two shoulders, and one torso.
I've begun assembling one of the forearms. I am creating youtube videos of my entire build.
WOO HOO! I'm PRINTING A ROBOT!